Trace Tool
Trace Tool lets you create vector objects from raster images. This process is almost (though not entirely) automatic. Trace tool allows to vectorize one object (or set of similar objects) at once, but it cannot vectorize whole map with different types of objects at once. Tracing should be repeated for respective types of objects (filled areas, roads, rivers, etc.). Trace tools works with images with any common color depth (including True Color and bi-tone) that are sufficiently clean.
Raster image should be imported into work area with use of main menu > Image > Import command.
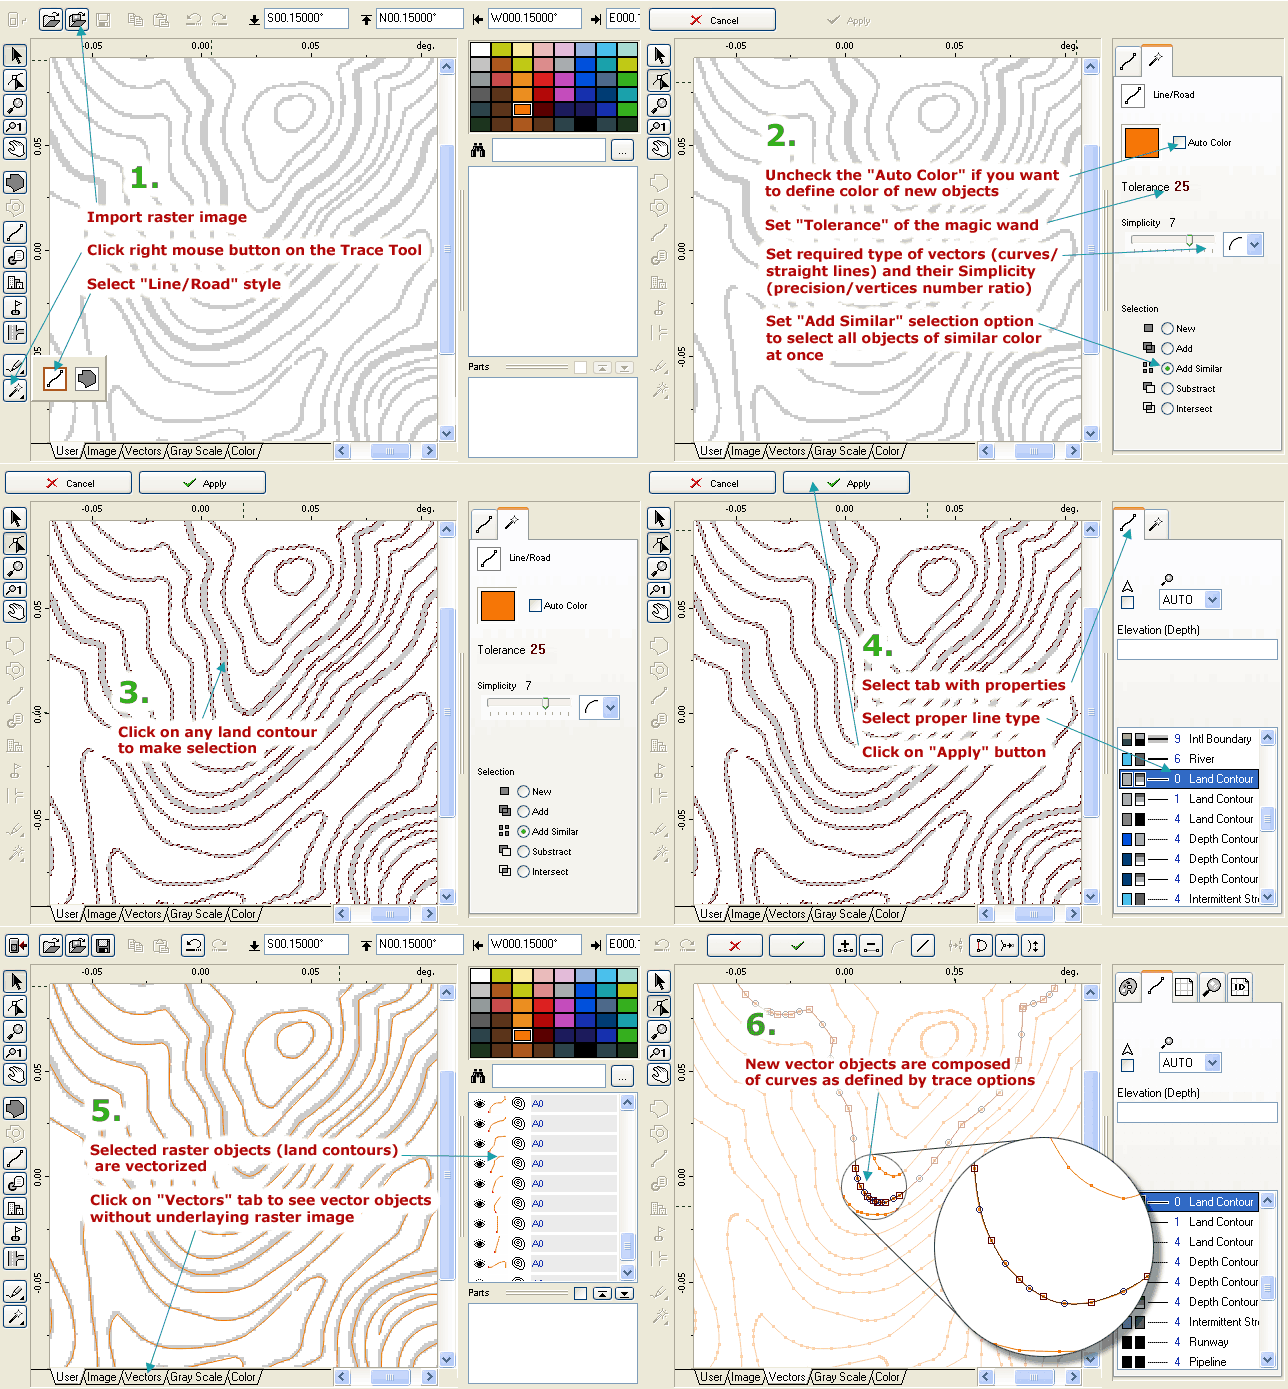
Vectorization involves several steps (see animated Fig.1):
- Activation of the trace tool, choosing of the proper trace style (see Fig.2)
- Setting of magic wand tolerance, selection options and vector object properties
- Selection of object or multiple objects on raster image with magic wand
- Setting of vector objects parameters (type of line, zoom level, etc.)
- Conversion of selected raster objects into vector objects

Fig. 1. Animation - Use of the Trace Tool
Before you start using the Trace tool, you should choose the style you want to use. Click with right mouse button on the Trace tool icon (in the Tool Bar). Panel with trace styles will appear (picture below). This panel can be invoked also by holding the left mouse button depressed about 1 second on the Trace tool icon.
Each style is represented by its icon. Hover the cursor over the icon to display the style name. Select desired style to activate the tool. Mapwel will switch to creation/editing mode.
Trace Styles
![]()
![]()
Fig. 2. Trace Tool styles
- Area
- Line/Road
- Routable Road
Trace Controls
Use these controls to adjust:
- Parameters of vector objects
- Magic wand sensitivity (tolerance)
- Selection operations for selecting multiple objects

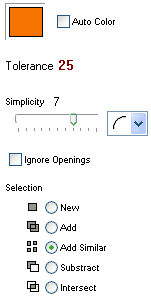
Color box - define color of vector objects. "Auto Color" must be unchecked.
Auto Color - color of vector objects will be taken from raster image.
Simplicity - varies in range 0..10. 0 means precise vector objects with high number of elements. 10 means low precision and low number of elements.
Edge Type combo box - select curve or straight lines type of vector objects.
Ignore Openings - valid only for polygons. Holes in vectorized areas are ignored, only the outer shape is vectorized.
Selection - various operations for selection of multiple or complex objects. Use "Add Similar" if you want to select non-contiguous objects of similar color at once.